2024-09-07
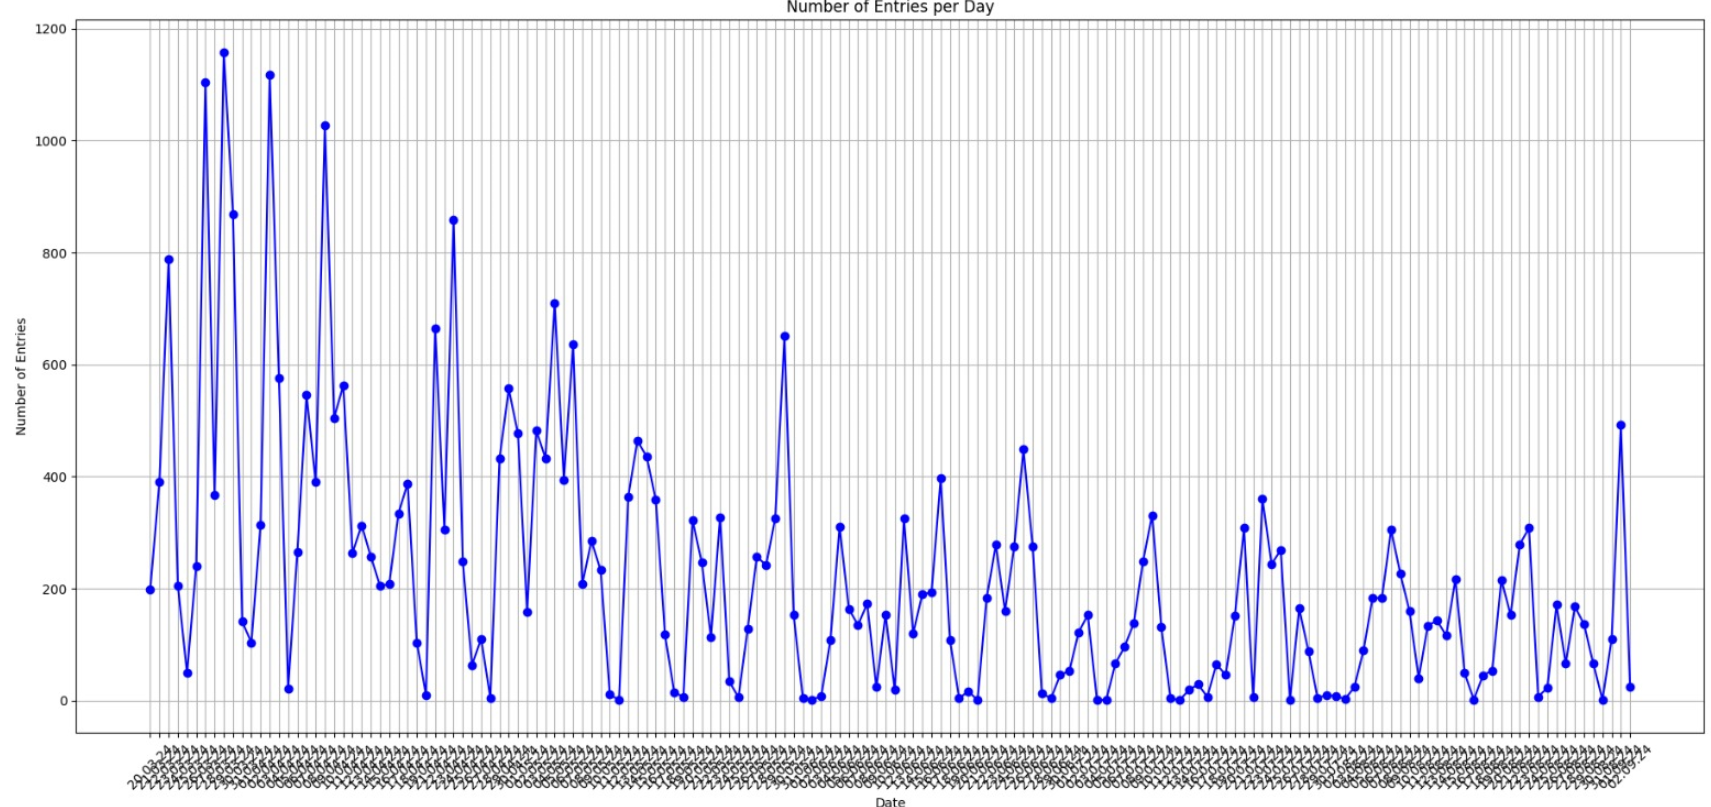
I have been trying to downgrade from iPhone to Android (don't ask me why), and first of all, #### Apple or any provider trying to make it extra hard to cancel their subscription or move away from their device. But that's not what this post is about. So, when trying to transfer my chats (which still does not work), I noticed that you can download the chats with another person. So, I decided to download the chats with my girlfriend. After doing some disappointing data analysis...
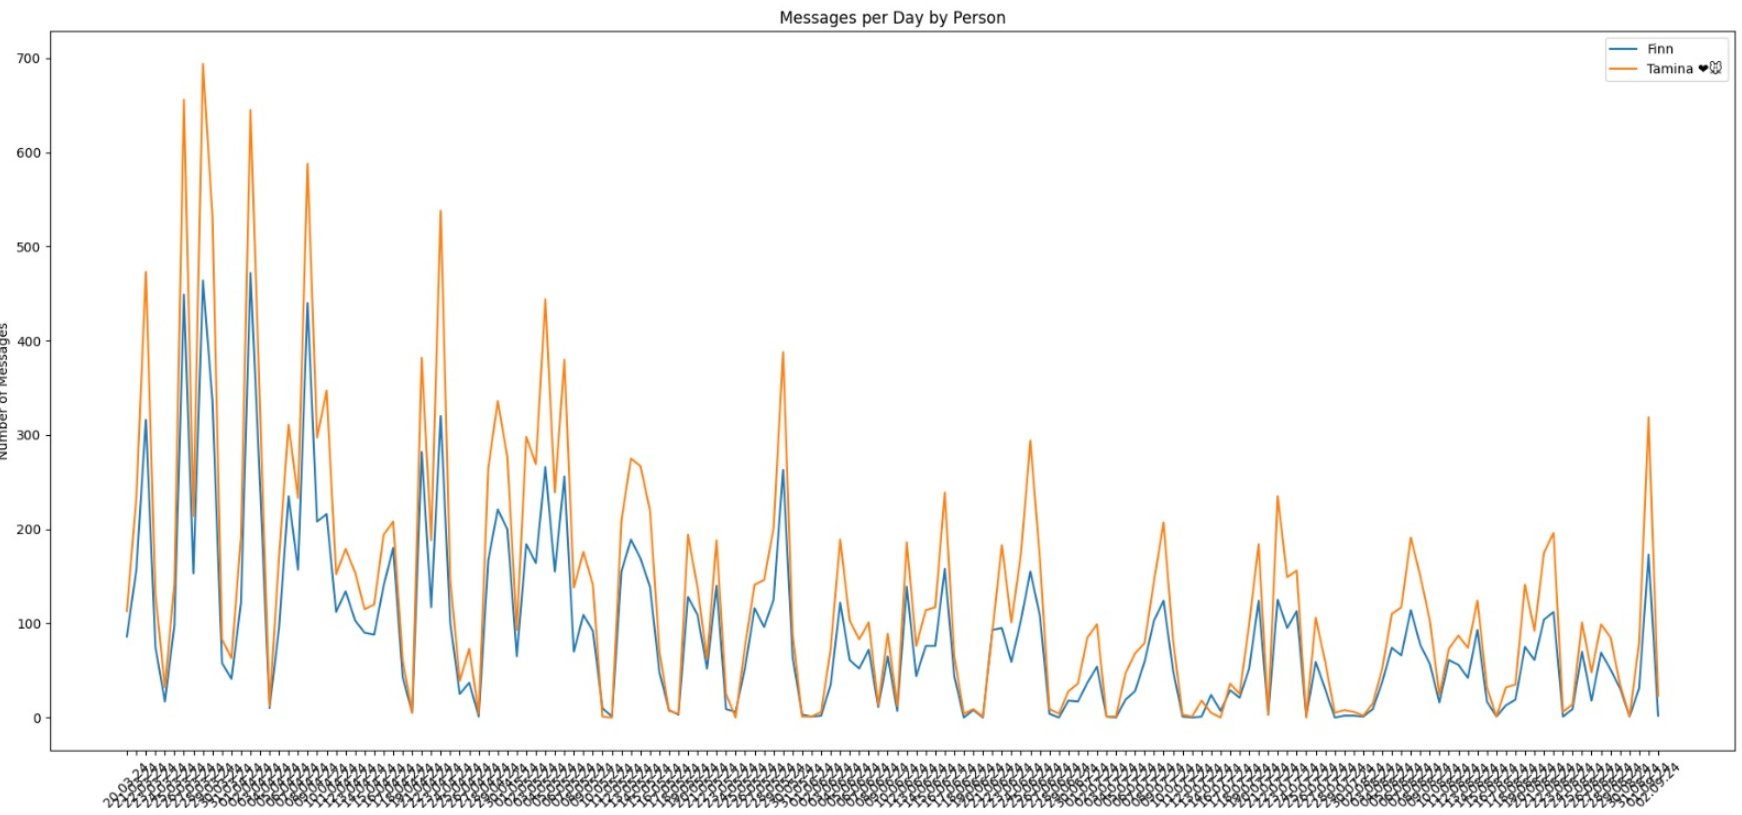
(but i guess thats normal???)
I decided to take the chat and fine-tune it on Llama 2 7B. In the end, everything took way longer than I intended. So, I have been reading some books about machine learning or AI in general, as well as binge-watching Andrej Karpathy videos. First of all, like I said, my knowledge in this field isn't that much (maybe because this field is so big), and this is also my first try at fine-tuning. I have built some smaller RAGs with Ollama for some of my stuff, but other than that, nothing. Let’s start with my first mistake, which was trying to run the code locally and train on some cloud GPU cluster that I would have rented for some dollars/h (let’s exclude the fact that I spent 3 hours trying to get the Torch library up and running). When I just executed the code in Google Colab and adjusted the parameters to run with the free Tesla T4 and the 15GB VRAM limit, everything worked out (kind of, but I will get back to this again). Before we start with any training or how the code is set up, I want to first start with how I prepared the data.
The data came in this format:
Then several lines of code fast forward, i transformed the data to get this output and stored it in a .jsonl.
To be able to have the right context between Message 1 and 2 was kind of hard because most of the time you aren't really saying anything after one another or typing in several messages. I just fixed that by stitching them together and having kind of the right context; it's still not 100% right, but I don't think I will ever achieve this.
Then I pushed the dataset to Hugging Face. With this code, I transformed the data from above to this format, as is being demanded for this Llama model.
Then I again pushed it to Hugging Face in this format. Now lets go into the code:
Let’s go through the library. I use Accelerate to train more efficiently by being able to train the models on multiple GPUs or TPUs. This would make it more efficient (I’m only training on one GPU, so it did not really matter). PEFT, or Parameter Efficient Fine Tuning, is used to freeze some weights of the base model and only update some of the parameters, so it is possible for me to even train (will go into this in more detail later). BitsandBytes is used to do some quantization to reduce memory while maintaining minimal accuracy loss. Transformers is used for loading the pretrained model and other tasks. And TRL helps with fine-tuning. And then, of course, Datasets is used for importing the datasets.
Some things we need to consider:
Now, before going into the code, I want to make some explanations that will be really useful. First, I'll try to explain what QLoRA (Quantized Low-Rank Adaptation) does and why we need it.
Quantization: Conversion from a higher memory format to a lower memory format.
Let’s start with a normal neural network perspective.
A neural network has weights for determining how to influence the output between layers or neurons. These weights get stored in matrices.
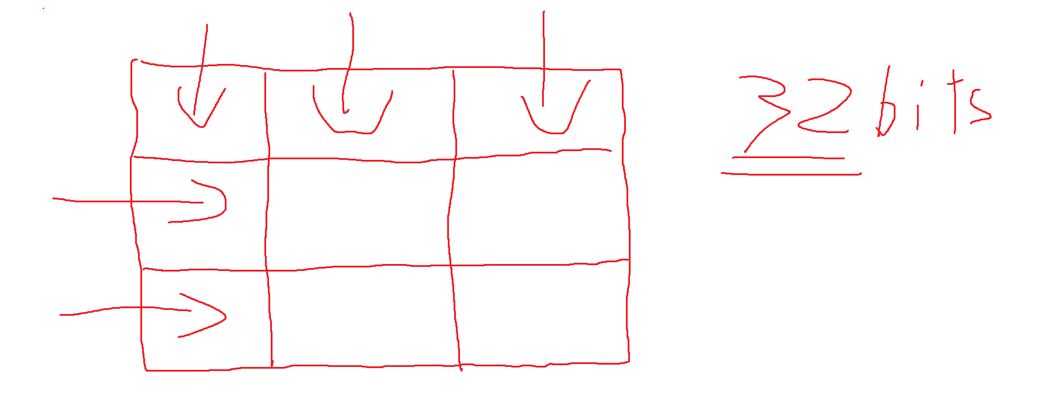
Now, let's say they are stored in FP32, also known as floating point 32 bits or just 32 bits. The parameters of the LLMs are constantly increasing (Llama 2 -> 70B, so 70 billion parameters in terms of weights and biases) and so are the matrices. Llama has that many parameters because they are stored in 32 bits. Now, I just can't take a 70B parameter model and load it into my basic home GPU VRAM. What you could do is go to AWS, create a cloud instance, and request X RAM and Y GPUs to load it there; the result would be a really high cost. So why not convert the 32 bits to UINT8 or FP16 and then load the model? This would have many advantages, such as being able to perform inference on mobile phones or smartwatches. The disadvantage is a loss of information and, consequently, a loss of accuracy, but we are able to mitigate this quite effectively.
Now, how does quantization work? 1. Semantic UINT8 quantization:
First, let's start with batch normalization.
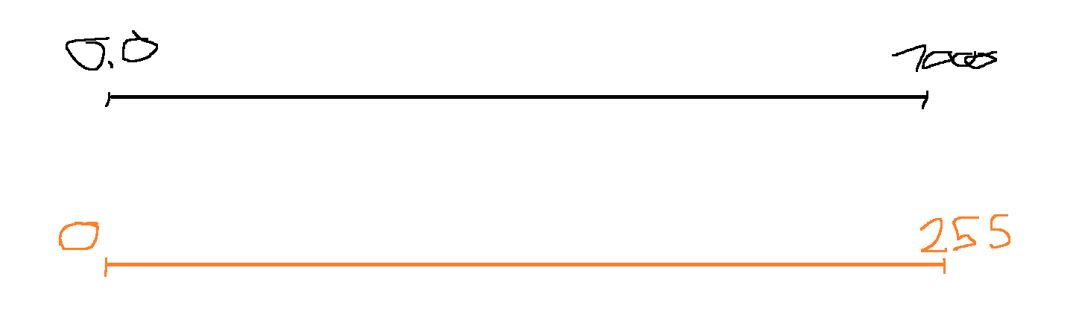
[0 … 1000] Let’s say you have a range of floating-point numbers between 0 and 1000 -> stored in 32 bits (which is basically how the weights are stored). Now you would want to convert it to UINT8 (Unsigned Integer 8-bit), which has an integer range of 0 to 255.
Now, let’s discuss how these values are stored:
Single Precision Floating Point 32
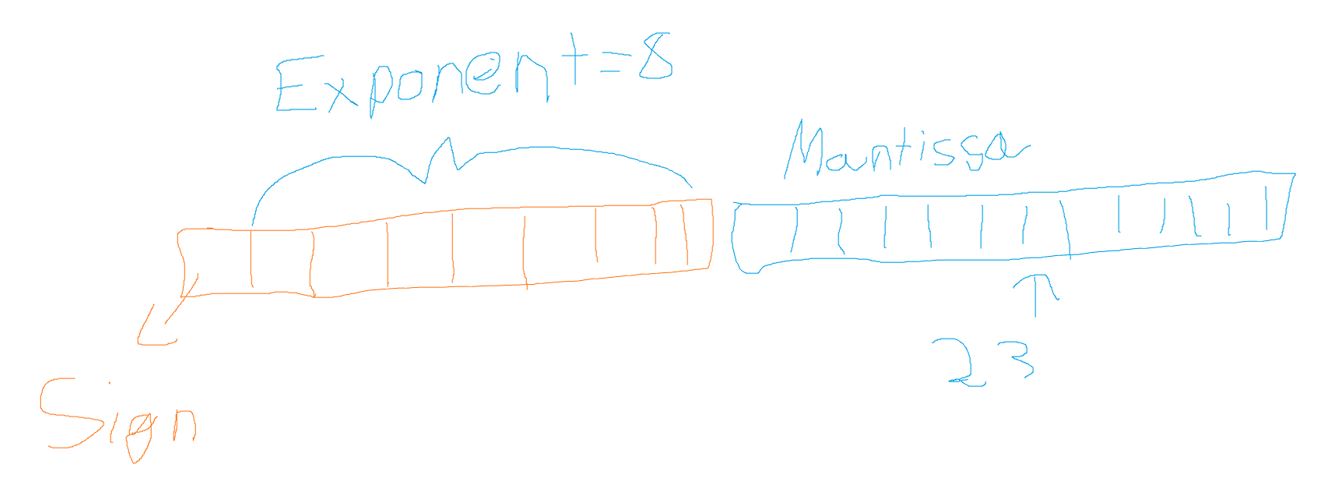
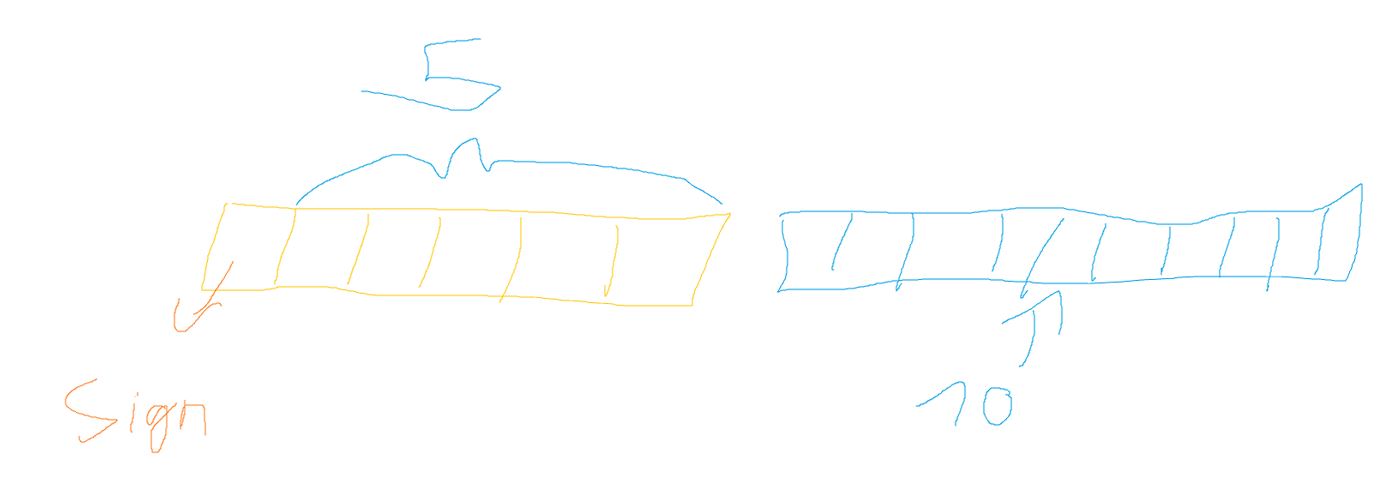
We have the first sign,single bit for determining if the number is positive or negative. The exponent is 8 bits long and represents the exponent, and the mantissa, which is 23 bits, represents the precision bits of the number. So, for example, the number 6.31 would have a 1 in the sign bit for being positive, the exponent 6 would be stored in binary, and the mantissa would store the 31. Now, if we had half-precision floating point (FP16), it would look like this:
So how do we convert it? We use a Min-Max scaler.
So...

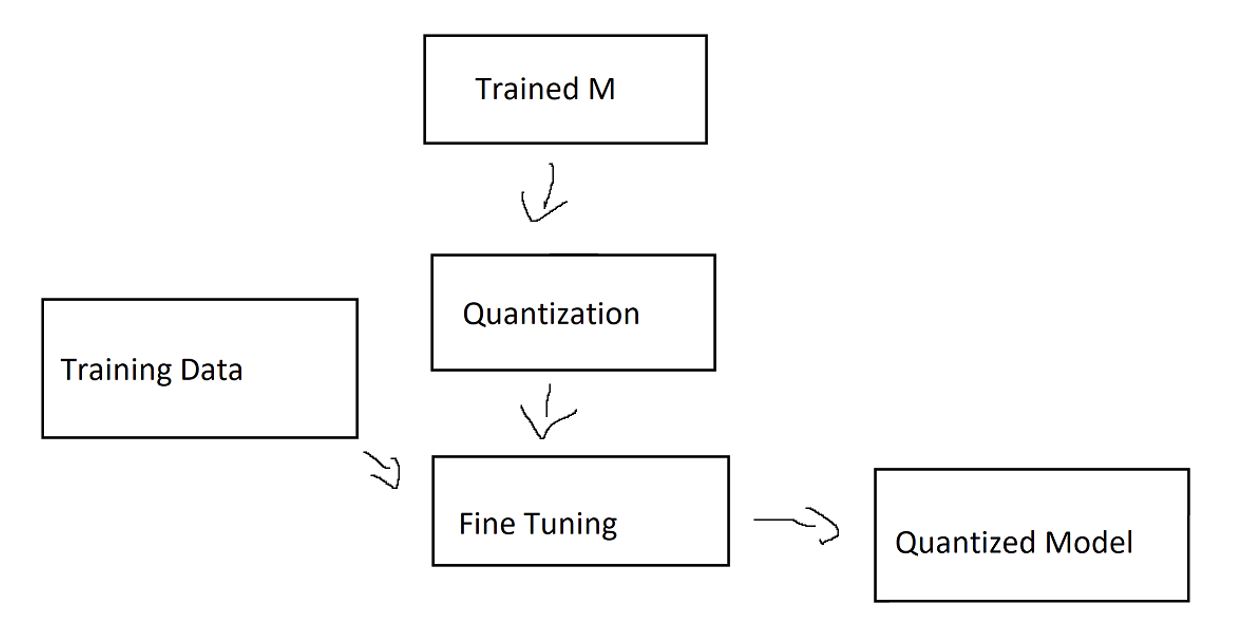
Now I can convert them with the scaling factor between FP31 and any UINT8 (yes, the second graphic shows FP16) . I won’t go into the mathematical details on how this works with negative numbers, so asymmetric UINT8 quantization. What we are using is Quantization Aware Training (QAT) (Which you can see below). Above, I talked about the loss of data and, as a result, the accuracy when quantizing with QAT we can make this loss impact a bit smaller by using new training data.
Now onto LoRa.
First, you have a base model trained on huge amounts of data from the internet or books, so it is pretrained. Now we fine-tune all the weights of the pretrained model (Full Parameter FT). Then you can fine-tune on specific domains like retail, sales, and so on, or do specific task fine-tuning. Full Parameter FT needs to update all model weights (7B), which is really resource-constrained.
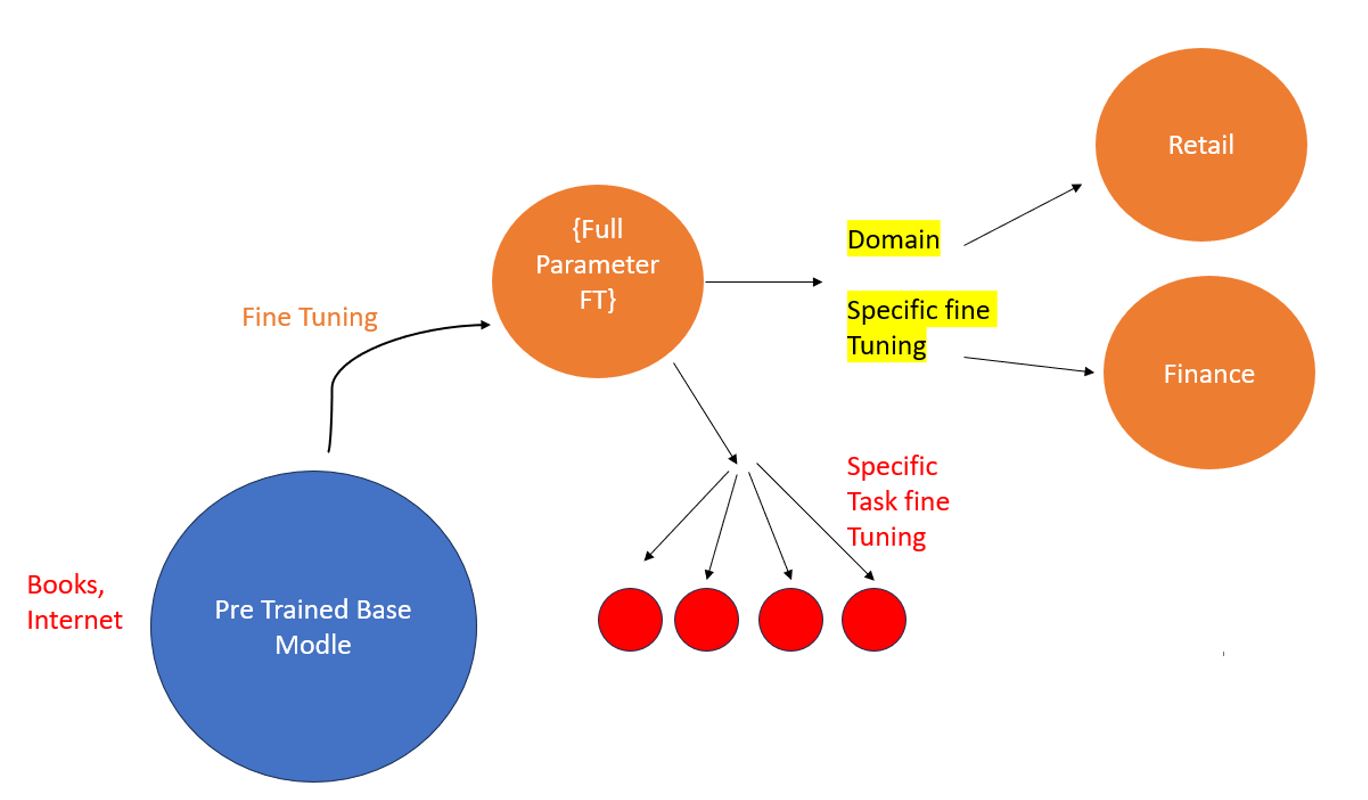
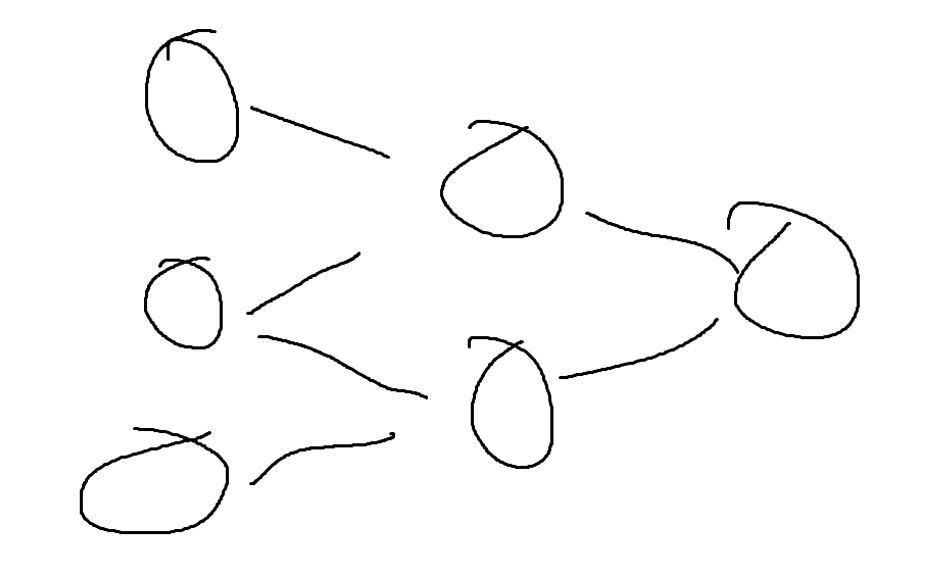
How to overcome this? We should not update all the weights of the base model; instead, we track the changes of the new weights. Let’s explain with a visual.
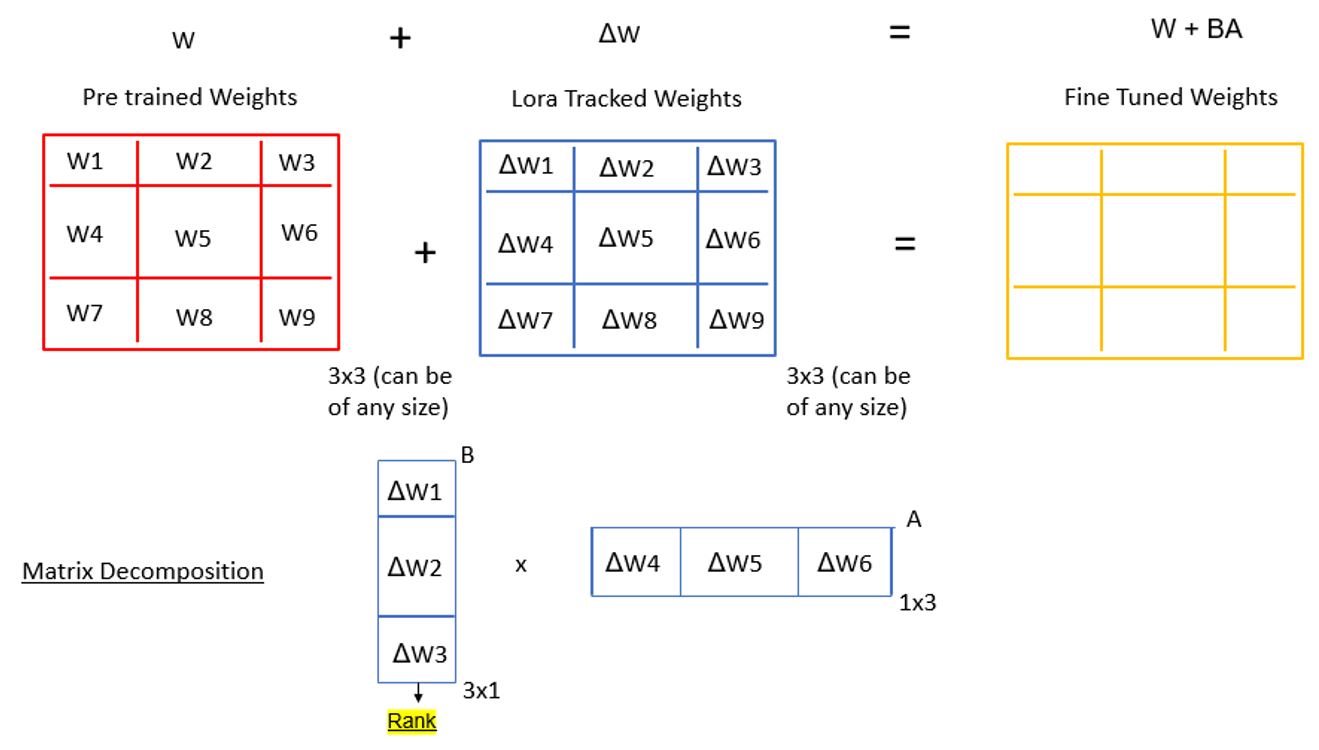
So instead of updating all the weights in the pretrained model in full parameter fine-tuning, we will track the changes of the new weights based on fine-tuning, as mentioned above. These will be the same size in this example (3x3; normally, it would be much higher, such as with 7B parameters). We will then combine them to have our fine-tuned weights. Instead of just tracking the weights in a normal matrix, we will use matrix decomposition. The matrix will be saved in two smaller matrices based on Rank. When we multiply them, we will get the same matrix, but using fewer parameters. This will make fine-tuning really efficient and will solve the resource constraint. (won’t go into the calculation of rank).
This is the calculation:

Now, if we increase the rank, the matrix decomposition parameters will also increase, but they will always be less than the original matrix (from which we decomposed) and significantly less then in the pre-trained model.

This is from the arXiv research paper on LoRa. As you can see, with increasing rank (hyperparameters), the trainable parameters increase as well. This happens with matrix decomposition freezing. You should use higher ranks the more complex the training should be. Now, LoRa can also take care of the quantization from above; this is then called QLoRA.
Let's get more into the code:
Now lets get into the QloRa parameters:
Then we load everything and start the fine-tuning process.
And use the text generation pipeline.
Now let’s get to the output and try to qualitatively determine if the output is accurate.


It seems about right on easy questions, but on harder ones, it gets kind of confused. I noticed that it is always giving multiple answers, probably due to the data structure in the JSONL. Some answers are really dependent on the situation. I’m kind of happy with the output; it’s not optimal but not bad either. I had around 9.69k data samples, but that did not work as I wanted, so I cut it down to 2k samples. With that, the output was okay. I also think that the data wasn’t the best due to the nature of how conversations occur on WhatsApp.
I’m sure if I play around with the parameters a bit, I could get better solutions, but for now, I’m quite happy. After what felt like 24 hours of research and building, I finally got it to work. In the future i will definitely try it again. This post is mainly intended to help me write everything down and, by that, better learn and remember it. If you see any major mistakes or anything, feel free to DM me. (I want to work on a Node.js integration to display comments.) For now, my Arduino arrived about a week ago, and I will be playing with that, as well as finishing the Nand to Tetris course, where you build the Tetris game from logic gates upwards. (I had a blog planned for that but lost the file on my computer. F#!##.)
Thanks,
Finn